1D Isomorphic Chromatic Piano Keyboard Mod
My approach to music theory is very mathematical and chromatic. To demonstrate, here are a few different ways one might think about a CMaj7 chord:
- The notes C, E, G, and B
- A stack of intervals: a major third, a minor third, and a major third
- A different stack of intervals: a minor third, a major third, and a minor second (for first inversion)
- A root plus the notes a major third, a perfect fifth, and a major seventh above said root
- A root plus the notes a minor second, a perfect fourth, and a minor sixth below said root (for first inversion)
- The pitch class set 0, 4, 7, 11
- The I7 chord of a C Major scale
- The IV7 chord of a G Major scale
Some of these interpretations imply a particular scale or harmonic context, some require fixed pitches or notes, and others instead focus on the ratios and relative intervals within the chord. Each interpretation is useful in a different context and tells us something different about the chord, but the quality of the chord, Maj7, is independent of the notes and is solely a function of the ratios of frequencies of the notes which make up the chord, or equivalently the set of intervals which make up the chord. A BMaj7 will have different notes, but it can still be considered as the same stack of intervals, or as the same set of intervals from the root.
I have never liked the popular Western piano keyboard layout because it prioritises the C Major diatonic over all other keys, by making the notes of the C Major scale the white keys and moving the ‘accidentals’ to black keys. The design of the keyboard makes it awkward to play in any other key without explicit practice, and is a big motivator for the musical advice to “practice in all twelve keys”. For example, a CMaj7 uses four white keys, a DMaj7 uses two white keys and two black keys, and a GMaj7 uses three white keys and one black key. Because the black keys are a different shape, in a different position, and at a different elevation, the layout of the keyboard fundamentally impedes the development of muscle memory around chord quality, and mandates that a chord, scale or melody line must always be thought of in a specific diatonic context. The effect is particularly detrimental for beginner players, who have twelve times as much work to learn the keyboard if they want to be able to play in any key.
By comparison, a bass guitar is (usually) tuned with each string a perfect fourth above the next, and each note is accessible on the fretboard (or fingerboard) in the same manner as all the others. If you want to play a CMaj7, DMaj7 or GMaj7 arpeggio on a bass guitar, you can use the same pattern in three different places on the neck and you are always playing a chord with a Maj7 quality. As someone who thinks in a very mathematical, chromatic, and patterned way, this has always seemed much simpler to me.
There are many different designs for isomorphic keyboards1 which preserve intervallic distance and chord shapes as one moves around the keyboard, but the vast majority of these are 2D, which presents some problems for ergonomics – rotating my hands to hit different keys is less intuitive to my body than keeping my fingers in the same relative position and moving my hand left or right. The only 1D isomorphic layout I could find is the Dodeka Stellar keyboard2, which is pegged to launch on Kickstarter this year, but which is as of yet unavailable.
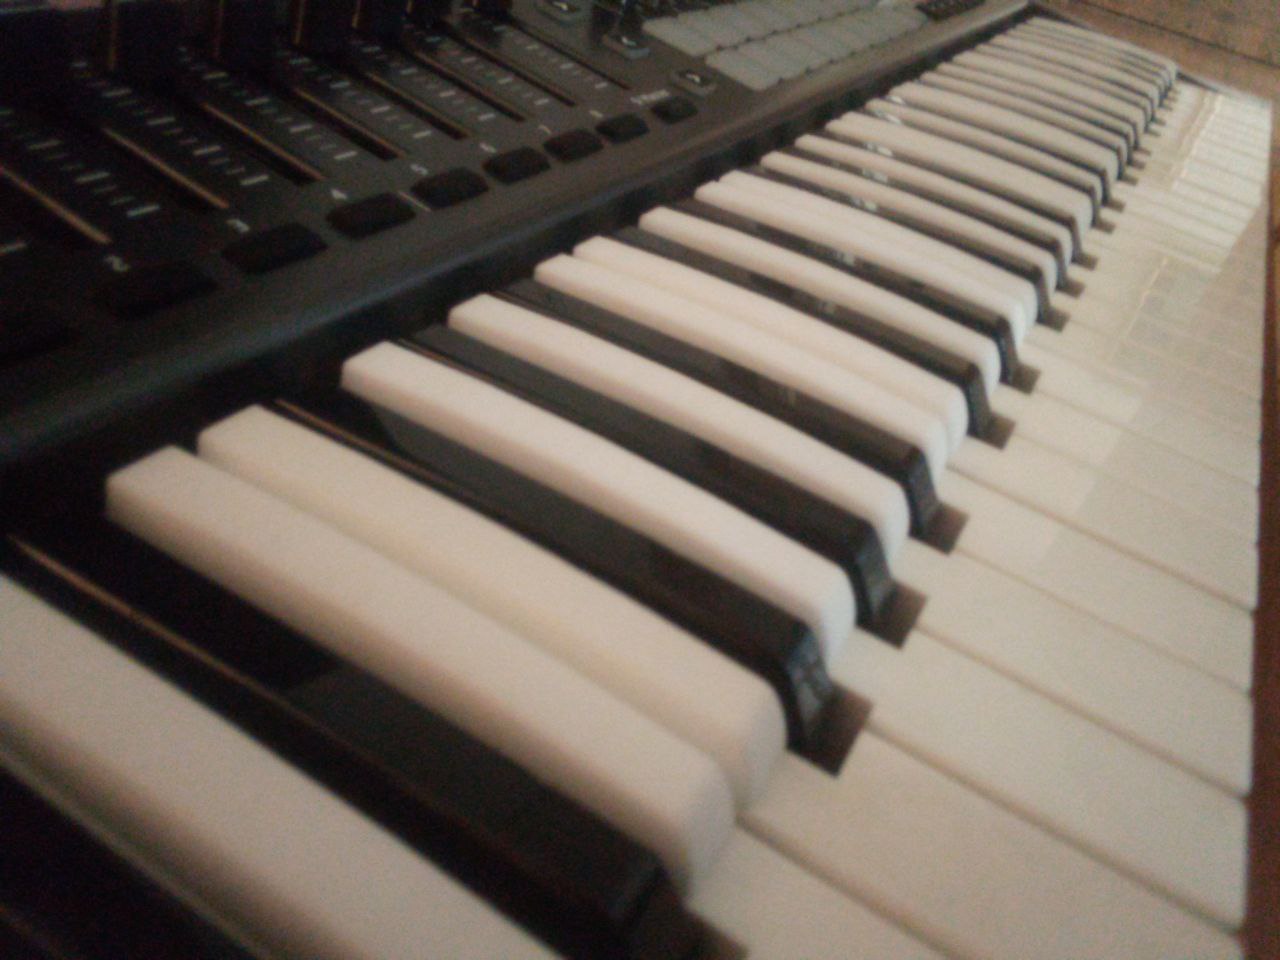
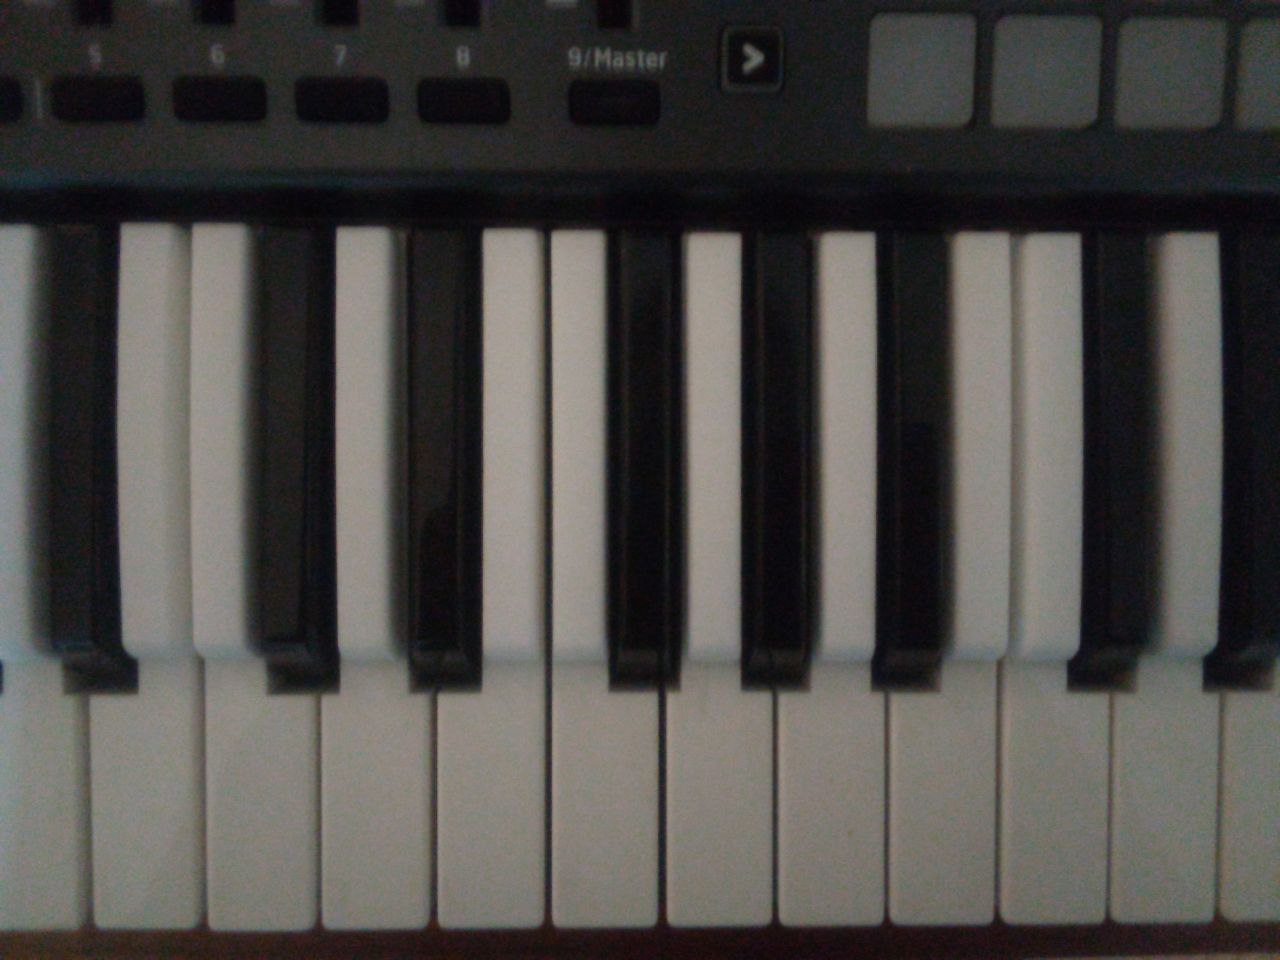
Similar to the Dodeka layout, I have modified a MIDI keyboard (a Launchkey 49 Mk 1) with ‘risers’ on the white keys, to fill in the gaps between the black keys and present a single row of identical keys, all separated by a semitone.
The risers are 3D printed, and to make them I first had to create a CAD model. I placed a piece of card in between a black and white key and used a pencil to trace the profile (side) of the black key. I made sure to mark out the base of the riser as the top of the adjacent white key. I used some Vernier calipers to measure the length of the black key, the elevation at the back and front, and the width at the base and across the top. I also measused the width of the narrow section of the B, C, E and F keys where I would be placing two risers on adjacent keys – it is important to make sure that the base of the riser does not extend over onto an adjacent key. With my sketch and measurements, I was able to build a basic model using Onshape3. I was able to import the sketch, scale it according to the measurements, draw the outline of the side of the key, extrude the 2D profile into a 3D model, draft the sides to create a taper from the base to the top, and then fillet the corners to make them rounded. Once the model was complete I exported it as an STL4.
The next step was prototyping. I couldn’t find any 3D printing providers who would do a small run of three risers without a high minimum order or startup cost, but fortunately I have a friend with access to a 3D printer who was able to print me three risers (thanks Jack!) in order to check that the length and height are suitable and to make sure that the risers don’t foul the adjacent keys.
After validating the prototypes, I ordered the complete run of 29 risers (for a 49 key keyboard) at a cost of ~£45 incl. VAT. Once the risers arrived I used double sided tape to stick the risers to the white keys.
I have only just finished the mod today so I have yet to try out the new layout for recording, but I am optimistic. This has been a fun project and I enjoyed learning about CAD modelling as part of the process, a great skill to have as 3D printing becomes increasingly ubiquitous.
References
-
https://www.dodekamusic.com/products/dodeka-keyboard/stellar/ ↩
-
If you’d like a copy of the STL I made I’m happy to provide this if you shoot me an email 😊 ↩

